Friday, March 28, 2014

GWT - ClientBundle in Action

ClientBundle is the GWT's way to organize the non-js resources, such as css codes, images.
Getting resources into client bundle is simple as declaring a method with some annotations. 
public interface AppBundle extends ClientBundle {

    interface Style extends CssResource {

        String appleBackground();

        String orangeBackground();
    }

    @Source({"App.gwtcss", "App.css"})
    Style style();

    @Source("orange.html")
    TextResource orangeDescription();

    @Source("apple.html")
    TextResource appleDescription();

    @Source("apple.jpg")
    ImageResource appleImage();

    @Source("orange.jpg")
    ImageResource orangeImage();
}
As shown above we have 2 html files included as text, 2 jpg images and 2 css files mashed into a single Style interface.
The tricky part is how do we reference the images inside the css code.
@url appleUrl appleImage;
@url orangeUrl orangeImage;
these two lines instruct the GWT compiler to create two variable appleUrl and ornageUrl out of the images we included, then we can write out css codes as
.appleBackground {
    background-repeat: no-repeat;
    background-image: appleUrl;
    background-position: right center;
}

.orangeBackground {
    background-repeat: no-repeat;
    background-image: orangeUrl;
    background-position: right center;
}
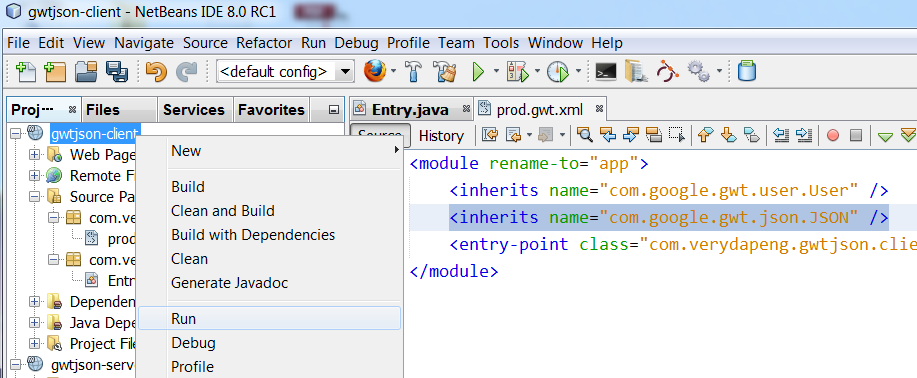
there is one caveat about this @url codes, netbeans is not happy with non standard css codes, if we keep the codes inside the App.css, we will have a red face netbeans like this

so i decided to move the @url codes into a special App.gwtcss file.
The .ensureInjected method of the generated Style must be called, otherwise we will have the correct class name but the css content will NOT be injected into the page.
Pulling resources out of the ResouceBundle is straight forward
FlowPanel panel = new FlowPanel();
panel.setStyleName(bundle.style().appleBackground());
panel.add(new Image(bundle.appleImage()));
panel.add(new HTML(bundle.appleDescription().getText()));
RootPanel.get().add(panel);
here is the final result, we have a FlowPanel with a "right center" positioned background apple image, also containing an apple image tag and some random html codes from the apple.html.
There are more black magics to discover from the CssResource doc.
Code is available here https://github.com/verydapeng/gwt-tutorials, under ClientBundle folder.
Happy Coding

Tuesday, March 18, 2014

GWT - client server communication - json

So far my discussions about GWT are exclusively front end technologies, today let's move on to the more exciting client server communication world.

By far, I think the easiest way to expose server side functionality is to build some JSON services. There is even a funny name for it, "thin server architecture". Without further ado, let's build the simplest possible JSON service and deploy to tomcat.
@WebServlet("/serverTime")
public class ServerTimeServlet extends HttpServlet {

    @Override
    protected void doGet(HttpServletRequest req, HttpServletResponse resp)
            throws ServletException, IOException {
        resp.setContentType("application/json");
        resp.getWriter().write(String.format("{\"time\":\"%s\"}",
                new Date().toString()));
    }
}

and test it
Now setup a new gwt client project, to access the XMLHttpRequest functionality, we need to make use of the RequestBuilder.
RequestBuilder rb = new RequestBuilder(RequestBuilder.GET, "/gwtjson-server/serverTime");

rb.setCallback(requestCallback);
rb.setRequestData("");
rb.send();

the vanilla RequestCallback can only accept text response, we need to parse the JSON string using JSONParser.
private void processJson(String jsonText) {
    JSONValue json = JSONParser.parseStrict(jsonText);
    String serverTime = json.isObject().get("time")
                            .isString().stringValue();
    Window.alert("Server time is: " + serverTime);
}

However, JSON package is not enabled by default, so we need to add the following line to the gwt.xml file
<inherits name="com.google.gwt.json.JSON" />
Now run the gwtjson-client project as well as start the super dev mode,

Navigate to sdm.html (super dev mode host page), compile the project if necessary. For working with super dev mode, please refer to my previous post.
Notice, we are not constrained with java servers here, it is possible to serve the serverTime request with any capable servers, Apache, Node.js, .Net etc. The client project has nearly zero knowledge of the server side technology.

And for any sensible team you should not stop here, the request builder api is still quite primitive and cumbersome to use (Java 8 I am looking at you!). You are encouraged to come up with your own wrappers with a more fluent API. Here is an example
Ajax.url("/login")
    .param("username", username)
    .param("password", password)
    .post(callback);


Codes are available here https://github.com/verydapeng/gwt-tutorials, under gwtjson-client and gwtjson-server folders.

Happy Coding

Tuesday, March 11, 2014

GWT - Super Dev Mode

We are losing the classical GWT dev mode pretty soon, Firefox support is already removed, and soon will be the end of Chrome support. For the teams that are using GWT, it is time to jump to the new ship, Super Dev Mode.
The idea is pretty straightforward, the super dev mode will dump the compiled javascript codes to the browser as well as the original java files and their bindings, so that we can leverage the browser's built-in debugger.
In classical dev mode, the server serves both the GWT related javascript codes as well as the non gwt stuff, things like the host page, some other external css, images. The GWT super dev mode server ONLY serves the GWT-Javascript related stuff, so we need another server to serve the host page. We literally need to run two servers during development. The good news is the host server can be anything, Tomcat, Glassfish, Jetty, Jboss, or even non Java servers like ngix, apache, IIS, depends on the server technology you choose.
Since we are using maven, let's make use of the embedded jetty for the sake of simplicity.
First, create the GWT project as you always do.
Now edit the pom to add jetty, add the following lines to section

<plugin>
    <groupId>org.eclipse.jetty</groupId>
    <artifactId>jetty-maven-plugin</artifactId>
    <configuration>
        <scanIntervalSeconds>10</scanIntervalSeconds>
        <webApp>
            <contextPath>/test</contextPath>
        </webApp>
    </configuration>
</plugin>
Now make sure the jetty plugin is doing its job by running custom maven goals, "jetty:run"


Now let's start the GWT code server by running "gwt:run-codeserver", after a short compilation you should see this

Follow the url http://localhost:9876/ and drag the "dev mode on" to your bookmark bar.

Now we need a new html page to load the resource from the code server. Let's call it superDevMode.html
<script src="http://localhost:9876/app/app.nocache.js"></script>
Notice the only difference here is we are using a different src url that the original index.html. I am sure that most of you can comfortably merge the two files with any sensible server side template framework, jsp, php, asp.  It is your own call. Open the newly created page in browser, and click the bookmark.
From now on, every time you make a change to the java codes, you need to click the compile button. Here you may want to bookmark the compile button as well. As soon as the background compilation is done, your page will be reloaded. Now come to the debugging business. Make sure your browser's debugger is loading source maps. This are chrome's instructions, and this are firefox's instructions. Time the press the glorious F12, and set the mighty break point. Chrome and Firefox screenshots are included. IE11 doesn't support source maps, however the classical dev mode still works for IE, so there is no big deal here.

What are you waiting for? huh? Go press the F5!
Codes are available from https://github.com/verydapeng/gwt-tutorials under the SuperDevMode folder. Happy Coding.

Friday, March 7, 2014

GWT - images and uibinder

Today we will meet a new friend in the ui:binder's world, <ui:image>. It is used to tag images to be included into the uibinder.
<ui:image field='logoImage' src='gwt.png' />
<ui:style>
    @url logoUrl logoImage;
    .logo {
      background-repeat: no-repeat;
      background-image: logoUrl;
      width: 100px;
      height: 100px;
    }
</ui:style>

<g:FlowPanel>
    <g:Image resource='{logoImage}' />
    <g:HTML styleName='{style.logo}'>
        hello image
    </g:HTML>
</g:FlowPanel>
We need to give a name to the newly included image via the "field" attribute. There are two ways access the image, both are demonstrated in the above codes

  1. use <Image> widget 
  2. use the image as css background-image. notice the @url rule 

There are several benefits of letting GWT compiler handles the images for you.

  1. Images can be anywhere on the classpath, instead of being canned inside the /images/ folder. Now suppose we are writing a reusable component, the component can be nicely encapsulated inside a dedicated package, and the client of the component is hassle free, just include the jar and we are good to go.
  2. GWT compiler will do extra work to make the image cache friendly. The image will be either be assigned a random name, or embedded directly into the css codes using data url. The file name is determined by hashing the content of the image, so in case the image never changes, the name remains the same, now we can happily set the TTL of the image to be 1 year at the cache layer. By default, GWT will make a smart guess if the images is small enough, it will be included as data url. You can disable this feature by explicitly set <set-property name="ClientBundle.enableInlining" value="false" /> in the prod.gwt.xml. 
  3. Since the original image file name is not used in the final output, we are free of naming collision. Dev A can have a logo.png under packages com.verydapeng.mod1, Dev B can have a logo.png under package com.verydapeng.mod2. There is no need to come up any naming scheme like /images/logo_mod1.png, /images/logo_mod2.png
Codes are available from github https://github.com/verydapeng/gwt-tutorials, under the /Images/ folder

Happy coding ...

Friday, February 14, 2014

GWT - i18n made easy

Let's start by creating the good old java properties file, for now let's say we want to support English and Chinese.


Right click the String.properties file, then "Open"


However this properties file can not be directly accessed by the client code, as there is no file system when the complied javascript is running in the browser. GWT makes use of the deferred binding to solve this problem.

We need some interface to represent the keys, and let the GWT compiler/runtime decide how to access the properties file and to decide which language to load. Since the properties to interface translation is pretty mechanical, we could let the tool to do that for us. .
<plugin>
    <groupId>org.codehaus.mojo</groupId>
    <artifactId>gwt-maven-plugin</artifactId>
    <version>${gwt.version}</version>
    <configuration>
        <runTarget>index.html</runTarget>
        <skip>${gwt.skip}</skip>
        <module>${gwt.module}</module>
        <i18nConstantsBundles>
            <i18nConstantsBundle>com.verydapeng.i18n.client.Strings</i18nConstantsBundle>
        </i18nConstantsBundles>
    </configuration>
    <executions>
        <execution>
            <goals>
                <goal>i18n</goal>
                <goal>compile</goal>
            </goals>
        </execution>
    </executions>
</plugin>
notice we have added a new <i18nConstantsBundles> tag to tell gwt-maven-plugin which properties file to translate. We also need to add a new maven goal <goal>i18n</goal>.

add a custom goal to netbeans gwt:i18n, and run it. we shall see the generated interface.

we also need to modify the way to fire up the dev mode


to access the interface, call the might GWT.create

Strings strings = GWT.<Strings>create(Strings.class);

GWT.log(strings.username());
GWT.log(strings.password());
The bad news is every time a new property is added, you need to run the gwt:i18n goal again (changing the value of a property does not need to do so). The good news is the dev mode can pick up the new property on the fly. Just press F5.

using it inside uibinder will be even more fun
<!DOCTYPE ui:UiBinder SYSTEM "http://dl.google.com/gwt/DTD/xhtml.ent">
<ui:UiBinder 
    xmlns:ui='urn:ui:com.google.gwt.uibinder' 
    xmlns:g='urn:import:com.google.gwt.user.client.ui'>
    
    <ui:with field='strings' type='com.verydapeng.i18n.client.Strings'/>
    
    <g:HTMLPanel>
        <table>
            <tr>
                <td><ui:text from='{strings.username}' /></td>
                <td><g:TextBox /></td>
            </tr>
            <tr>
                <td><ui:text from='{strings.password}' /></td>
                <td><g:PasswordTextBox /></td>
            </tr>
        </table>
    </g:HTMLPanel>

</ui:UiBinder>
and here is the result
now we need to switch to Chinese mode. add the following code to the prod.gwt.xml to tell gwt compiler that we would like to use Chinese.

<extend-property name="locale" values="zh"/>
now restart the GWT dev mode and change the url from
  http://127.0.0.1:8888/index.html?gwt.codesvr=127.0.0.1:9997
to
  http://127.0.0.1:8888/index.html?gwt.codesvr=127.0.0.1:9997&locale=zh
and voila, the Chinese characters come out.

There is more than one way to inform the compiled GWT codes which locale to pickup. One way is to use the locale url parameter as shown above.

You can also use a meta tag to do this.
<head>
    <meta name="gwt:property" content="locale=zh">
</head>
If neither the url parameter nor the meta is desirable, then we can also make use of cookie. Just tell the GWT compiler which cookie name is designated for locale tracking.
<set-configuration-property name="locale.cookie" value="lang"/>
each methods has is own pro and cons, do evaluate all of them and pick the best match.

Code samples are available from https://github.com/verydapeng/gwt-tutorials under the i18n folder

To read more about GWT locale handling, go to http://www.gwtproject.org/doc/latest/DevGuideI18nLocale.html

Friday, February 7, 2014

GWT - UiBinder Quick Intro

Before we start the UiBinder business, let's rewind the clock to GWT 1.x era. This is how to create a simple "click me" button.
public class Entry implements EntryPoint {

    @Override
    public void onModuleLoad() {
        Button button = new Button();
        button.setText("click me");
        button.addClickHandler(new ClickHandler() {
            @Override
            public void onClick(ClickEvent event) {
                Window.alert("hello world");
            }
        });

        RootPanel.get().add(button);
    }
}

Thanks to java's verbosity, the signal to noise ratio is pretty low. It goes wild quite fast when we need to express nested DOM structures, like
public class Entry implements EntryPoint {

    @Override
    public void onModuleLoad() {
        Button button = new Button();
        // ... some init code
        Panel outterContainer = new FlowPanel();
        // ... some init codes
        Panel innerContainer = new FlowPanel();
        // ... some init codes
        
        outterContainer.add(innerContainer);
        innerContainer.add(button);

        RootPanel.get().add(outterContainer);
    }
}
Another problem here is, since java code is kind of linear, little aid is provided by the editor to present that nesting structure.

So the xml came to save the world, and we moved to the GWT 2.x era. The basic idea of UiBinder is to express the dom in xml instead of java.
<!DOCTYPE ui:UiBinder SYSTEM "http://dl.google.com/gwt/DTD/xhtml.ent">
<ui:UiBinder 
    xmlns:ui='urn:ui:com.google.gwt.uibinder' 
    xmlns:g='urn:import:com.google.gwt.user.client.ui'>
    <g:FlowPanel>
        <g:Button>hello world</g:Button>
    </g:FlowPanel>
</ui:UiBinder>
The above code will be translated by GWT compiler as
FlowPanel panel = new FlowPanel();

Button button = new Button();
button.setText("hello world");

panel.add(button);
To programmatically access the generated component, we need to give an identifier in the xml
<g:Button ui:field='myButton'>hello world</g:Button>
Now let's move to the java code, the key here is we are going to declare a seemingly orphan interface, then obtaining an instance of it via the might GWT.create() method.
public class Entry implements EntryPoint {

    interface UI extends UiBinder<FlowPanel, Entry> {}

    @Override
    public void onModuleLoad() {
        UI uiBinder = GWT.create(UI.class);        
    }
}
Then using the @UiField annotation to link to the button.
public class Entry implements EntryPoint {

    interface UI extends UiBinder<FlowPanel, Entry> {}

    @UiField Button myButton;
    
    @Override
    public void onModuleLoad() {
        UI uiBinder = GWT.create(UI.class);
        uiBinder.createAndBindUi(this);
        
        Window.alert(myButton.getText());
        RootPanel.get().add(myButton);
    }
}
Now run the project, you will see a boring alert once the app is loaded.

But wait! UiBinder can do more than that, it can be used to hook events. Things to note here,
  1. @UiHandler annotation, it's value needs to be the same as the java field name (myButton)
  2. the annotated method has no return value, void. 
  3. the annotated method takes exactly one argument, which needs to be of some GwtEvent. here ClickEvent is a sub class of GwtEvent
  4. the field must have corresponding addXXXHandler()
  5. the annotated method name as well as the argument name can be anything 
Here is a sample declaration
@UiHandler("myButton")
void onButtonClick(ClickEvent e) {
    myButton.setText("hello event");
}
Now refresh the page and click the button to see its text changed.

Codes are available from https://github.com/verydapeng/gwt-tutorials under the folder UiBinder-Quick-Intro

To dig more out of uibinder, follow the link here http://www.gwtproject.org/doc/latest/DevGuideUiBinder.html

Wednesday, February 5, 2014

GWT - maven based project setup

Let's start with an empty maven web project.


Time to config the pom.xml

<project xmlns="http://maven.apache.org/POM/4.0.0" 
         xmlns:xsi="http://www.w3.org/2001/XMLSchema-instance"
         xsi:schemaLocation="http://maven.apache.org/POM/4.0.0 
            http://maven.apache.org/xsd/maven-4.0.0.xsd">
    <modelVersion>4.0.0</modelVersion>

    <groupId>com.verydapeng</groupId>
    <artifactId>Project-Setup</artifactId>
    <version>1.0-SNAPSHOT</version>
    <packaging>war</packaging>

    <name>Project-Setup</name>

    <properties>
        <maven.compiler.source>1.7</maven.compiler.source>
        <maven.compiler.target>1.7</maven.compiler.target>
        <failOnMissingWebXml>false</failOnMissingWebXml>        
        <gwt.version>2.6.0-rc3</gwt.version>
        <gwt.module>com.verydapeng.project.setup.prod</gwt.module>
        <project.build.sourceEncoding>UTF-8</project.build.sourceEncoding>
    </properties>
    
    <dependencies>
        <dependency>
            <groupId>com.google.gwt</groupId>
            <artifactId>gwt-user</artifactId>
            <version>${gwt.version}</version>
        </dependency>
    </dependencies>

    <build>
        <plugins>
            <plugin>
                <groupId>org.codehaus.mojo</groupId>
                <artifactId>gwt-maven-plugin</artifactId>
                <version>${gwt.version}</version>
                <configuration>
                    <runTarget>index.html</runTarget>
                    <skip>${gwt.skip}</skip>
                    <module>${gwt.module}</module>
                </configuration>
                <executions>
                    <execution>
                        <goals>
                            <goal>compile</goal>
                        </goals>
                    </execution>
                </executions>
            </plugin>
        </plugins>
    </build>

</project>
create the gwt module xml, under the package com.verydapeng.project.setup. let's call it prod.gwt.xml
<module rename-to="app">
    <inherits name="com.google.gwt.user.User" />
    <entry-point class="com.verydapeng.project.setup.client.Entry" />
</module>
create the Entry class
package com.verydapeng.project.setup.client;

import com.google.gwt.core.client.EntryPoint;
import com.google.gwt.user.client.Window;

public class Entry implements EntryPoint {

    @Override
    public void onModuleLoad() {
        Window.alert("hello world");
    }
}

create the index.html

<!DOCTYPE html>
<html>
    <body>
        <script src="app/app.nocache.js"></script>
    </body>
</html>

Now we are almost done. The project view should be something like this now


Time to run the project!

create a custom action to run the gwt:run goal


wait the GWT dev mode to show up, click the Launch Default Browser button


and viola, Hello World. You may need to install the GWT plugin, if you haven't done so.


sample codes are available here https://github.com/verydapeng/gwt-tutorials under the Project-Setup folder